Showing posts with label pull-throughs. Show all posts

Friday, July 13, 2012

Friday's Film: Flower Buns

My princess absolutely loves this new style and has requested to wear it again already.  These darling buns form the perfect flower.  You can always do just one bun instead of two as well. 
See how easy that was!  It looks great with hair that's not as long also but you may want to divide your ponytail into more than just 4 sections so you get lots of "petals". 
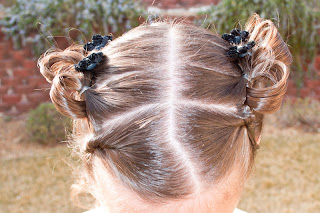
Here's a view of the zig-zag part we used.  Feel free to use any part you like. 
You can see that our flower has several petals because of how long my princess's hair is.
I've gone ahead and tucked all my final ends up into the bun but you could leave them shooting out which is also cute.
The flowers are going to look different every time you do this hairstyle but they are always cute!
You can tell that this is her new favorite style!  :)

Wednesday, July 11, 2012

Magic Wand

Today we have a really easy style that you can take pieces of to dress up any average ponytail.  First you will want to pull all of the hair back into a ponytail.  It can be low or high - doesn't really matter.
  Now grab a Topsy Tail and divide the ponytail into 3 equal parts, 1 in the top middle and two on the sides.  Begin with that top middle piece and feed it through the loop of your Topsy Tail.  Poke the tool down behind the elastic and pull the hair through.  Hold on to a bit of the hair that is closest to your elastic so that is does not get pulled all the way through with the rest of that section.  This will create a little bump right at the top of your elastic. 
Now take one of your side sections and repeat the steps, just making sure that you feed your Topsy Tail sideways behind the elastic.  Take your final piece and create your last side bump.  Now you will have three sections of hair coming out of the ponytail, behind the elastic. 
 
You can stop at this point and curl the ends if the hair is not too long.  For the longer hair you can use the three sections to create a Regular 3-Strand Braid. 
The braid will be the stick of the wand and the puffs above will be the top.  You could even jazz it up with some spray glitter if you wanted to.  :)

Monday, July 9, 2012

Variation on Pull-Through Crown

We came up with this after first creating our Pull-Through Crown.  Directions for that can be found on our post from last Monday which is here
We decided to take that hair that was hanging down and twist it up to create a more formal updo. 
Starting on the left side, we divided the hanging hair into small sections and made twists out of them.  Each twist was draped below our crown and the end was secured up and over it with a bobby pin just behind the original crown. 
We did this several times creating several draped twsits. 
This was done on the right side as well.   
To finish it off we just added some small flower hair pins and she was ready to go. 

Monday, July 2, 2012

Pull-Through Crown

This is a style that we will be using over and over again because I love the look of it and it holds all day long. 
You have to start this style by first creating the Butterfly Wing style found here.  Make only three butterfly wings instead of gathering all the hair as done in the original post.  Once you have your three rows of butterfly wings you are ready to move on. 
Begin on the left side of the head and grab a small section of hair just below the bottom twist and right next to the ear.  Comb it smooth and then feed it through the hoop of your Topsy Tail.  Feed the Topsy Tail over the top of the twists and then down behid the back and pull it through. 
This is essentially creating a Pull-Through right over the Butterfly Wings.  Grab another small section of hair right next to your first and repeat the steps.  Do this all the way along that left side until you have come to your elastics in the middle.  (You can use as many sections of hair to create Pull-Throughs as you would like - they can be small or large, it really doesn't matter.) 
Now move over to the right side and repeat the same steps.  Once you have finished that you can complete the style by pulling the middle ponytail over the elastics in one final Pull-Through.  Pull that last one just tight enough to conceal the elastics but not to flip completely through.
Don't forget to click on the label "4th of July" on the sidebar for all sorts of fun hairstyles for Wednesday!

Friday, June 29, 2012

Friday's Film: Tied Updo

Thanks for being patient while we were on vacation for a couple weeks.  We had a fabulous time in Hawaii and I wanted to share this picture of a French Braid that we found in Oahu:
 They have taken individual palm fronds and wrapped them around the stems of the trees and French Braided them. 
 They did a pretty good job don't you think?!

The hairstyle we've decided to share today is called the Tied Updo and it's simple yet beautiful.  The original inspiration for this hairstyle can be found on my Pinterest board here.

My princess has such dark hair when it is wet but hopefully you are still able to follow the instructions.
Here is a picture of the finished product.  Cute huh!
 
I wish that our puff was a bit bigger which would be an advantage to working with dry hair. 
 
You can use as many bobby pins as you need when securing your bow. 
Good luck and remember that practice makes perfect!

Wednesday, June 6, 2012

Kissy Lips & Bendy Braids

You will definitely need a Topsy Tail or tool like it for this hairstyle.  It's got two parts to it - the "Kissy Lips" and the "Bendy Braids" but they both derive from the same components, Inverted Pull-Throughs and regular Pull-Throughs. 
Here is what the Kissy Lips look like.  First you will gather a section of hair at the top of the head into an elastic.  Then create an Inverted Pull-Through by poking your Topsy Tail up from under the elastic and pulling the hair through.  Next you will gather another section of hair right before the first and secure it into an elastic - making sure to add in that hair from your Inverted Pull Through.  Have your new elastic lying fairly close to your previous one.  Now create a regular Pull-Through with that new section of hair by poking your Topsy Tail down through the hair behind the elastic.  These two Pull-Throughs create your Kissy Lips.
I've sectioned out the hair and done two sets of Kissy Lips on each side of the head. 
The lower set of Kissy Lips lies in the middle of the head on either side.
The hairstyle is finished off with Bendy Braids that are created simply by securing an elastic around the ponytail - about 1.5 inches below the previous elastic.  Now grab your Topsy Tail and create and Inverted Pull-Through with that section of your ponytail.  Add in another elastic (again 1.5 inches down) and create a regular Pull-Through.  Continue this pattern down through the ponytail and then follow the steps with the opposite ponytail as well.  The two different kind of Pull-Throughs will create a bent look in the ponytail.  The picture doesn't really do these justice but they are pretty cool. 

Monday, April 9, 2012

Simple Half Inverted Pull-Through

Here's a VERY simple hairstyle that is not really "original" but it's one I thought I'd throw out there for those mornings when you want something cute but don't have a lot of time.
 It's simply an Inverted Pull-Through using only half the hair.
Start by styling the hair how you would like - curls, straightening, etc.  We had some waves from braids the day before that we used.
Section the hair out from ear to ear and pull that top area into an elastic.   
Now grab your Topsy Tail and poke it upwards underneath the elastic.  Feed the hair through the loop and pull it up and through.  (Creating and Inverted Pull-Through as opposed to the regular Pull-Through.)     
Spread the hair out a bit so that it's evenly falling down.  Now your elastic is hidden and you have a cute little "poof" in the middle of the head.
Nice and simple yet different from an everyday look.  :)

Monday, March 19, 2012

2-Minute Updo

I saw this hairstyle on Pinterest and wanted to try it on my princess.  It looked so simple and it definitely was!  I thought I would post it for any of you that may not be on Pinterest but are still looking for a fast and beautiful hairstyle.
Start by pulling all of the hair back into a low ponytail at the nape of the neck.  We've also create a small off-centered part at the front of the hair but that is totally optional. 
Now create a regular Pull-Through with the ponytail by using your Topsy Tail or by just poking your fingers up through the hair behind the elastic, grabbing your ponytail and pulling it all back through that space. 
The hair should now look twisted on each side above the elastic and have a ponytail hanging below the elastic.  Now, starting at the bottom of your ponytail, grab all the hair and start rolling it up into the head.  (I always refer to this as a Barrel Roll.) 
It will roll up right over your previous twists and into the head where you are going to bobby pin it into place.  Add a fun hair clip to it if you'd like and you're finished.  It takes less than two minutes and it will look beautiful all day long!

Friday, March 16, 2012

Friday's Film: Clover

Happy St. Patrick's Day everyone!  We wanted to post a video on our Clover hairstyle before the big day and this is our last opportunity to do it.
I apologize for the small slip up on the left side of the clover but I fixed it after filming and you can see the outcome in the pictures below.
Here's a picture of how we did the top of her hair since it was hard to see in the video.
Once you've creates the three sides of your clover you will join them together with an elastic. 
Then go ahead and pull the rest of the hair down to the nape of the neck - including the new ponytail from your clover - and secure it all into an elastic.   
We finished it off with a Quad Braid and some cute hair clips.
She was all festive for her day at school and now her hair was ready to go too!

Monday, February 27, 2012

Puffy Braid Stegosaurus


A little while ago we did a post on The Stegosaurus hairstyle and this is a bit of a spin off on that.
  Begin with wet hair.  We started by dividing the hair in half with a part directly down the middle of the head.  Our part started a bit off-centered before going straight to the middle just to bring the bangs to one side. 
 Next we created two small sections up front by creating a part on each side from the center down to the ear.  Each side was secured with an elastic and then we used the Topsy Tail to create a regular Pull- Through.  
We created another section on each side of the part just behind that original and secured it into an elastic - making sure to include the ponytail from the first Pull-Through.  Now you should have a small ponytail on each side.  Work with one side at at time and grab a small section out from the top of the ponytail and comb it smooth.  Now feed it through the loop of your Topsy Tail, poke the Topsy Tail down behind the elastic and partially pull it through so that you have a loop just over the elastic.  (You can see how to do this with a video tutorial if you click on "The Stegosaurus" link at the top of this post.)  Go ahead and do this for both side of the head. 
Now create two new sections of hair just below the last and secure them into an elastic - Making sure to include the ponytail and Pull-Through hair from the section above.  (Note: be careful not to pull the loop out of shape as you include your Pull-Through hair into that new ponytail.)  From this point you will just repeat the steps from above for making your loop and then continue repeating the steps as you create new sections of hair to add in. 
Once all of the hair from the head has been added in, you will just repeat the steps as directed without adding new hair when you secure a new elastic.  Do this all the way through your ponytail and the length of the hair will determine how many loops are created.  As you are securing your final elastic, Only pull the hair half way through so that you create a loop of hair at the bottom as well for more of  a finished look. 
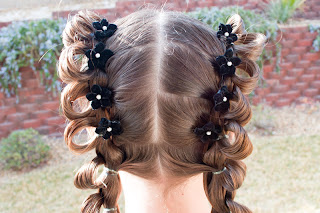
Go back up and add any hair clips that you would like.  We've just added some velvet black flower pins next to a few of the elastics. 

Friday, February 24, 2012

Friday's Film: Carousel Braid

This one has been floating around Pinterest and I really like the look of it. 
 This is our attempt at recreating the Carousel Braid and hopefully the video will help you as well. 
One of these days I will master the whole filming hair thing.  I still really struggle with creating a hairstyle from an angle.  :)
Here is what the finished product looks like.  Pretty huh!
Here is a side view and this braid looks good no matter how you look at it. 
This is a close-up of what we did on top of her head to start it all off.
We pulled the braid back to her ponytail, wrapped it around the elastic and then secured it in place with a Topsy Tail. 
For a fun little variation tey this "Squished Carousel Braid".  You basically just squish all of your twists up and secure the bottom elastic higher onto the ponytail.  Kind of neat how the add-ins all fan out!