Friday, April 15, 2011

Flashback Friday: Accessorize!

Nothing is more adorable than these little knitted beanies on little girls.  My princess had a little Thanksgiving party at her preschool and we put two low braids in her hair and placed a brown knitted beanie on top. 
 I then fed the two braids through openings in the bottom-back of the beanie to hold it in place.  We added fall flowers to the ends of her braids and a larger fall flower onto her beanie.  Look for opportunities to use all of these fun accessories and especially these darling beanies!

Wednesday, April 13, 2011

Braided Scarf

We just wanted to be a bit creative today so we decided to try adding a scarf into a normal French Braid. 
This style works best if you start with wet hair.
  Start by sectioning out the top of the hair by creating a part from ear to ear. 
Secure that section with an elastic and then pull your scarf or ribbon through the elastic so that the very middle of the scarf is next to the band. 
Now you'll want to separate the hair from the elastic into 3 strands for your braid.  As you gather sections into the braid you will want to alternate the scarf on top of the added section and underneath the added section.  Make sure you keep it the same for both sides of your scarf. 
When you have added all of the hair into your braid, add in the two pieces of scarf and finish it off with a 5-Strand Braid.  (Using the scarf as the 2 extra strands.) 
 Secure it at the bottom with an elastic and add a hair clip to hide the elastic. 

Monday, April 11, 2011

Upside Down Updo

I love this hairstyle because it works perfectly for dance recitals and we have lots of those around here!
I start with wet hair and have my princess lay on her bed with her head hanging over the edge so I can braid upside down.  Begin by parting the hair horizontally across the middle of the head - from ear to ear.  Clip aside the hair that is up by the face and only work with the half by the neck. 
 Create a French Braid and when you've gathered all the hair from the bottom half of the head just finish off the braid and secure it with an elastic. 
 Pull the hair on the top half of the head tightly into an elastic and create 2 Regular 3-Strand Braids. 
 Now wrap all three of your braids around each other and secure them all down with bobby pins. 
Make sure that your loose ends are tucked underneath the wrapped braids. 
Spray it with hairspray for a nice tight hold.  We also sprayed a bit of glitter in her hair for the performance.
  Add some flower clips wherever you like and it's finished!

Friday, April 8, 2011

Flashback Friday: Fairy Hair

flaFor Halloween in 2007, my princess was a fairy. 
We did a simple yet pretty look for her costume by pulling the top part of the hair up into to small piggies and then creating curling iron ringlets with the rest of it.  We sprayed her hair with spray glitter (which you can't really see in the picture) and added little flower clips to hide the elastics. 

Wednesday, April 6, 2011

Rose Headband

This is really a simple hairstyle but it's so fun to look at and it's a pretty one for church or a night out.  You can do it with or without a headband but we had a band that matched her dress that day so we decided to use it. 
Your first step is to straighten all of the hair - or curl it all. 
Next you'll want to create a 2 inch part off from the bangs - making sure it's a bit off-centered.  Now section out the hair from that part all the way over to the farthest ear. 
Comb that small section of hair forward and place your headband over the rest of the hair. 
Now divide that section that you pulled forward into two section and create a 3-Strand Braid out of each section.  Secure those braids at the ends with elastics and get some bobby pins handy. 
Now simply roll the braids around themselves over the headband.  (One on each side of your flower on your headband.) 
 Tuck the loose ends under the rolled braid and secure them down with bobby pins. 
Give them a good spray with hair spray to hold and you're all finished!

Monday, April 4, 2011

Easter Basket Bun

Here's a fun little Easter hairstyle to get you started.  I remember (in the old days) the cool plastic Easter basket that I used each year and it was pink and white and woven. 
 This hairstyle reminds me of that. 
Begin by pulling all of the hair back into a tight ponytail. 
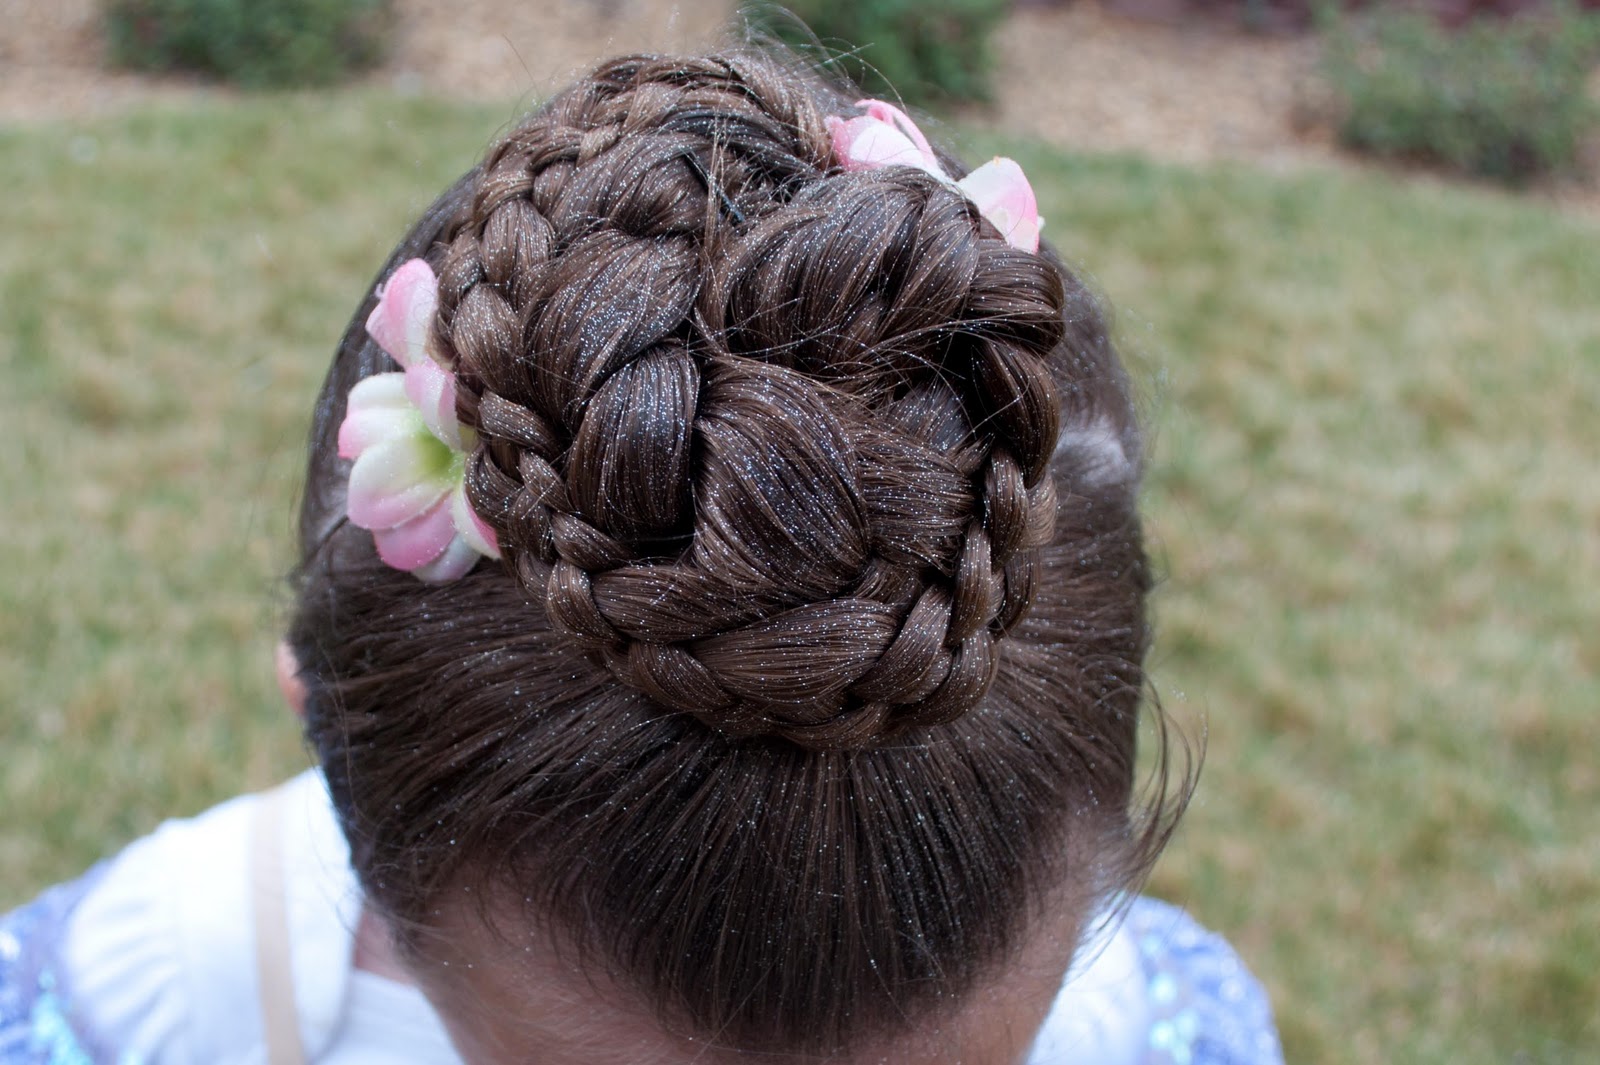
Now separate that ponytail into 3 equal sections and create a  Regular 3-Strand Braid out of each section.  Wrap the braid over and around each other, in no particular order, and secure the ends under the bun with bobby pins. 
Now choose your ribbons that you want to use and grab a plastic yarn needle for the threading.  Leave about 3 inches of ribbon un-threaded under the bun and weave the rest around the bun in an "over/under" motion.  When you get back around to the bottom of the bun, leave another 3 inches hanging down.  Grab a second ribbon and weave it through - making sure to alternate your over under pattern.  You can weave as many ribbons as you like. 
 Once all of your ribbons have been added, gather all the 3 inch ribbons from under the bun and tie them together in a large knot to secure them from slipping out. 
We've also added a little plastic flower clip onto the bun and these little clips are really cool because they change color in the sun. 
 This is what they look like out in the sunshine and they come in a variety of colors. 
We found them at Walgreen's and they make necklaces too like my princess is wearing here.
  We love finding fun new things. 

Sunday, April 3, 2011

Double Lady Ga Ga's

Lady Ga Ga made this "hair bow" popular so that's the reason for the name.  :)
Begin by parting the hair down the middle using any part you like.  (You can find ideas for various parts here.)  Secure each side with an elastic so that you now have two piggies.  Make sure the hair in the piggies is damp so that it is easier to work with. 
These hair bows can be created in several different way but this is that way that worked best for us.  Grab a small section from the top of one of your piggies.  Shape one "hump" of your bow and tie an elastic around it to hold the hump in place.  Create the other hump with some more of that section of hair  - leaving about 2 inches of hair still out.  Secure that hump with another elastic so that you now have 3 elastic all close together on top of your piggie.  (One from your original piggie and two from each hump.) 
  Divide that extra hair that you left out of your small section into two equal pieces.  Wrap the left piece up behind the left hump and the right piece up behind the right hump now criss-cross the two pieces over each other - hiding the elastic - and wrap them back behind the piggie. 
You're going to tuck those ends into the main elastic holding your piggie.  (Do this underneath the piggie so that it's concealed.)  Repeat these same steps for the bow on the other piggie as well. 
 It may not be necessary for you but I did make sure the bows were lying flat against the head by making a "X" with two bobby pins attached to each bow. 
 
You can choose to leave the piggies just straight or finish them off with any braid that you like.  We've done a Flat 4-Strand Braid here.  There's no need to add bows to this one because you already have them!  She got lots of compliments at school and I do have to admit that it's quickly becoming one of my favorite styles!