
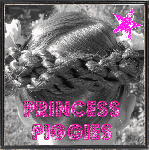
My princess fell in love with this hairstyle we saw here at Princess Hairstyles. I did not get a picture of her hair before she ran off to school so unfortunately these shots were taken after a full day of play. (It did look much better when it was first done!) :)

I started by straightening all of her hair but you could also wave it or curl it if you like..

I then moved up to the top of the head and made an off-centered part going from the bang line back to the crown of the head.

I started with the larger side of the part and grabbed a group of hair form the bang line that I divided into two pieces. Take the piece closest to the ear and cross it over the other piece and then pull it under and through - like tying your shoelaces. Now pull it loosely to tighten it a bit and then twist both pieces in the direction of the part to "flip" the knot. Gather in a little bit of hair from the part and add it into the inside piece of hair and repeat those steps. Once all of the hair from the part line has been added in, you can hold that side in place with an alligator clip while you move over to the other smaller side.

Get your two pieces of hair and remember to cross the piece closest to the ear over the other one when tying it. Also remember to flip it toward the part.

Once both sides are finished you can secure them together at the back of the head with an elastic. Add a hair clip to hide the elastic and you're all done!


3 comments:
Another gorgeous do! I've just recently found you blog & I'm loving your ideas, keep up the good work!
I don't understand. Can you do step by step pictures?
Aliceson, go ahead and click on the link above in the post and it will take you to a video instruction that is very helpful! Good luck! And thank you "Anonymous" for the thoughtful post!
Post a Comment