Wednesday, August 31, 2011

First Day of 3rd Grade Hair

My princess started 3rd grade this week and she was so excited for her first day of school.  She had the Bottom Braids and Bun hairstyle the day before for church (which we created a video for and will be up soon!  Woohoo!) so we just used the waves from those braids.  You can also get waves by just braiding wet hair the night before or using an electric waver.
 
We wanted kind of a Bohemian look so we basically just made a short off-centered part on the top and then gathered some hair back into an elastic. 
We did leave some hair loose by the ear so that it was not a full half-up hairstyle. 
We tied a ribbon over the elastic and just let the rest of the hair fall in waves.   It was very simple but very beautiful.  It did not take very long either which is perfect for those morning that you just need to get out the door!
She had a great first day of school and had many compliments on her hair.  

Monday, August 29, 2011

Baptism Picture Hair

My princess is getting baptized at the end of this week and we wanted to get some pictures taken for the invitations.  This is the hairstyle that we came up with:
First I completely dried her hair and then I began by creating an off-centered diagonal part in the front.  (I had more of the bang-line on the right side of the diagonal.)  I then sectioned out the hair from one ear to the other so that I was only working with the top half of hair. 
I tied off the left side of my diagonal part so that it was out of the way while I worked with the right.  You'll want to create four even sections out of that side and make sure they run parallel to the diagonal part.  Secure each small area with an elastic at the back of the section. 
 Now move over to the left side and create 5 equal sections. 
 My first 3 section came straight off of the diagonal part instead of running parallel to it.  This just breaks up the design a bit.  Secure each of those areas with an elastic at the back of the section as well. 
 Now you should have 9 small ponytails at the top of the head.  Take each of those ponytails and cross them over and under each other in a weaving pattern.  Go ahead and secure the ends together at the back of the head with bobby pins creating an "X".  
You can either leave the remaining hair straight or curl it like we've done here.  We used a spiral curling iron to get these ringlets. 
We finished it off by giving it a good spray with hairspray and then adding some flower hair pins and velcro pearls. 
The hair not only held up through her photo shoot but all the way through the end of the day too. 
The pictures turned out great and she's very excited for her big day this Saturday!

Friday, August 26, 2011

Friday's Film: The Quad

It's Friday again!  Today we wanted to flashback to The Quad.  We had lots of questions on this one originally and it's a braid that we use ALL THE TIME!  People always stop us and ask how we did that so here are the instructions:
Hopefully that helps a bit and makes some more sense.  The first couple times I did it, I was really slow but after a few times it comes very naturally.  Good luck!

Wednesday, August 24, 2011

Awesome New Tip

I've tried many different ways of organizing our hair supplies and I've posted several of them in my Accessory Organization post. 

Click on the link for some great ideas for your ribbon, small clips, elastics, flowers and other hair supplies.
I've always struggled with organizing headbands.  They are bulky and don't fit in small containers. 
You may remember my post on the Cure for the Headband Headache (instructions are on the link) and this is definitely a great solution but I found that I only had room for two of these containers on the dresser and we had many more headbands that needed a home.  I was browsing my favorite new site, Pinterest, and came across another idea that I had to try:
They are paper towel rolls that I attached to the inside of the bathroom cupboard door.  The original that I saw was attached the wide way but I needed two so I attached mine the long way.
I took an unused roll of paper towel and covered it with some fabric. (Zebra is my princess's favorite)  I stitched the fabric together for the length of the paper towel, placed it over the roll and then just hot glued the two ends in place.  It works perfectly for us and hopefully it will be a helpful idea for you!

Monday, August 22, 2011

Hidden Half-Up

This hairstyle is really easy and has a neat look to it. 
 
It's easiest when using wet hair for this one.  Create a small off-centered part in the top of the hair and then comb everything straight. 
 
Grab some hair from along the hairline that is right above each ear.  Twist those two side over the combed hair and combine it at the back of the head with an elastic.  (Have the combined area somewhat low on the back of the head.) 
Now gather two more sections of hair just below the first two and twist them together at the back of the head as well and combine them with another elastic.  You should now have two elastics at the back of the head and a section of hair still hanging that is combed straight. 
 Grab all of that hanging hair and roll it up over the two elastics.  Tuck it underneath the elastics creating a roll.  Secure it in place using bobby pins and add any hair accessories you like to finish it off.   

Friday, August 19, 2011

Friday's Film: Bedtime Braids

*I have added a fun new Button on the side bar so feel free to grab it and attach to your blog!*

Hooray for videos!  This is our first "Friday's Film" and we're excited to get lots more out there for you.  (Make sure you let us know which hairstyles you want to see.)    I must say that I'm not a fan of my voice and my little princess and I are not perfect during our filming but hopefully these videos will help some of you with the hairstyles!  (I also apologize for my fumbling about - I have to say that I do get a bit nervous in front of a camera - guess I better get used to it huh!)
  We had several requests for a video on on our Bedtime Braids that we posted last week so here it is:
We also experimented with making these braids "French".
Here is a picture of what it looks like.
Just make sure you switch which side you do your double wrap on when you move to your other half of hair so that the braids will look even.
When you're done adding in hair you can just finish off the braid with the traditional Bedtime Braid from above.
Here is the video for this one: 
I promise we'll try to get better with the videos and we will for sure have another one next Friday!

Tuesday, August 16, 2011

Video Requests...

Hi there,  I've figured out the video problem and it's all fixed!  I'm going to be starting a new weekly post called "Friday's Film" and there will be an instructional video on a hairstyle every Friday.  Please let me know some of the hairstyles you are interested in seeing and I will get to work on my princess's hair!  :)  Please identify them by the post title so that I will know exactly which one has been requested.  Thank you so much for all of the wonderful comments and I apologize that the videos have been so long in coming!  :)
-Julie- 

Monday, August 15, 2011

Hairagami

I found this cool product at the store the other day and had to pick it up to try. 
 It's basically 2 slap bracelets that are sewn together that you place your hair between.  It's actually a fun little gadget.  There are several different hairstyles you can create with this little tool but here is one that we did that took us exactly 1 minute!!!  
 My princess had just jumped out of the shower so here hair was nice and wet and I pulled it all back into a ponytail.  I then flattened out the Hairagami and opened the two pieces.  I placed all of the ponytail between the two pieces and then pulled the Hairagami down to the ends of the ponytail. 
 I rolled the gadget up to the elastic - making sure to spread the hair evenly over the Hairagami as I rolled - and then pressed on it to curl it up. 
You can shape the curled Hairagami anyway you like and we did it in a cinnamon bun fashion. 
 We finished it off by adding a flower clip and we were done. 
It held very tightly throughout the whole day and even gave us some cute curls when we took it out.
  I'm excited to try some new styles with it so I'll post everything we do!

Tuesday, August 9, 2011

Hair Weave

This is really pretty but only works with longer hair - sorry all you cute little shorties out there!  This style is darling with either straight hair or curls.  Start with a small off-centered part in the front of the hair just so that you have definite sides.
 
Now move to the larger side and gather two sections from the hair line, just above the ear.  Have your princess hold the lower section while you begin with the upper section.  Weave it in and out of the hair using a Topsy Tail if you like or you can just use your fingers to life sections of hair as needed.  Go all the way around the back of the hair and then over to the opposite ear.
 
Secure the end of the hair with bobby pins.  Grab the lower section of hair from your princess and weave that around as well - making sure to alternate from the previous weave.  Secure that at the opposite ear with bobby pins.  (I tucked the bobby pins under some of the hanging hair to try and hide them.) 
You could do this with many more than two strand and really have a beautiful weave but it was bedtime for us so we had to stop with only two.  :) 

Monday, August 8, 2011

Bedtime Buns & Braids

*Side Note - I'm working on getting a few videos that have been requested uploaded to our blog.  I'm having a bit of trouble with some file conversions so hopefully those will be up soon.  Please be patient with me and thank you so much for all of your wonderful comments!*

Sometimes after my princess takes a bath she will sit and let me play with her hair before she goes to bed.  Here are some fun little ideas we came up with the other night and maybe they will help spark some creativity for you as well.
 
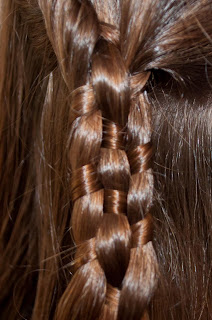
This one is just a simple combination braid with a few differences.  We began with a side French Fish Bone Braid and then secured that with an elastic.  Next was the 5-Strand Braid and finally the Corkscrew.   I just liked the look of this one because it was more of a side ponytail than my usual combination braids.
This isn't as much a "braid" as it is "weaving".  Gather three equal sections of hair and then a fourth section that is smaller than the rest.  Take that fourth section and weave it in and out of the other three sections.  That fourth section will run out before you get to the bottom of the other section so just secure it with an elastic when it's finished.  We've done this before with ribbon and two sections of hair so this is just another variation. 
Here's a really simple idea that would be really cute with shorter hair as well.  Divide the hair into two large sections to start.  (Keep in mind that we were just playing around so my part here is quite sloppy.)  Braid each of your sections and then secure each braid at the bottom with an elastic.  Now wrap the braids around each other and pull through - just like a Long Knot or tying your shoelaces.  
You can secure it in place with some bobby pins and either tuck the remaining braid underneath or just let them hang down like we've done here.
This one is really easy but has a pretty look.  Slick all of the hair straight back and secure half of it into a low ponytail using an elastic.  Now take the other half of the hair and twist it tightly toward the elastic.  Twist the hair that is in the elastic as well and make sure that you twist it in the same direction as the other piece.  Pull the loose Twist of hair over the top of the elastic and then twist the two twist around themselves to create a bun.
 Secure them in place by wrapping another elastic over the top.  You are left with a nice, tight low bun on the side. 
  This one is one of my favorites.  It's a regular 3-Strand Braid - with a twist.  Separate the hair into 3 equal strands and begin plating them as usual.  After you've done one full plate you will hold the left strand out for a minute while you twist the middle and the right over each other once more.  Now plate as usual once more.  Follow this pattern:  Plate as usual for a normal 3-Strand Braid - Hold out the left while wrapping the other two once more.  Repeat this pattern through the rest of the hair for a fun new braid. 
This is exactly the same as above but you will hold the left side out and wrap the other two strands around themselves TWICE before plating again as usual.  It would be fun to try wrapping it several times before plating as usual and seeing what that braid looks like as well!
Hope you enjoy some of these ideas!

Friday, August 5, 2011

Knotted Crown

My princess came up with the idea for this one and wanted to give it a try.  This hairstyle is easiest with wet hair.  
Start by making a straight part on the top of the head that goes all the way back to the crown.  The part can either be directly in the center of the head or a little off-centered like we've done here. 
 Now section out 3 parallel areas on one side of the part and secure each area into an elastic, giving you 3 parallel ponytails.  Move to the other side of the part and do the same thing.  Now make 3 more vertical sections going around the back that you will also secure into ponytails.  
Start with the back-center ponytail and wrap it around itself then pull it through the middle, creating a knot over the elastic.  
Now move to the adjacent two ponytails and create knots out of them as well.  (I had my princess hold the ends of my knotted ponytails until I secured them so they would not fall out.) 
 Pull the remaining hair from those two knots to the back knot and secure them in with that ponytail - just below the knot - with a tight elastic.  Move up to the next two adjacent ponytails and do the same thing. 
 Finish knotting the rest of the ponytails and adding the remaining hair into the back ponytail as shown here. 
Add some hair clips over the ponytail to hide all of the elastics. 
It turned out pretty cute and she was so proud of her creativity!